Homemade Peanut Butter Cups with Chocolate Shell
Highlighted under: Simple Baking Collection
I absolutely love making my own peanut butter cups at home! There’s something incredibly satisfying about combining creamy peanut butter with rich chocolate. Plus, I enjoy customizing them with my favorite ingredients. The process can be a bit messy, but it’s totally worth it when you pop a luscious cup into your mouth. This recipe is perfect for an indulgent treat or special occasions, and I'm excited to share my tips to ensure yours turn out perfectly every time.
When I first made these homemade peanut butter cups, I was amazed at how simple it was to recreate my childhood favorite. I experimented with various chocolate brands and found that using high-quality dark chocolate makes all the difference in flavor. The key tip is to temper the chocolate properly, which ensures a glossy finish and snap when you bite into them.
Another technique I’ve honed is to let the peanut butter filling chill before assembling. This helps maintain its shape and keeps each cup beautifully presented. Trust me, once you try making these yourself, you’ll never settle for store-bought again!
Why You'll Love These Cups
- Rich, creamy peanut butter filling that pairs perfectly with chocolate
- Customizable with your favorite nut butters or add-ins
- Perfect for sharing or enjoying on your own
Mastering the Chocolate Shell
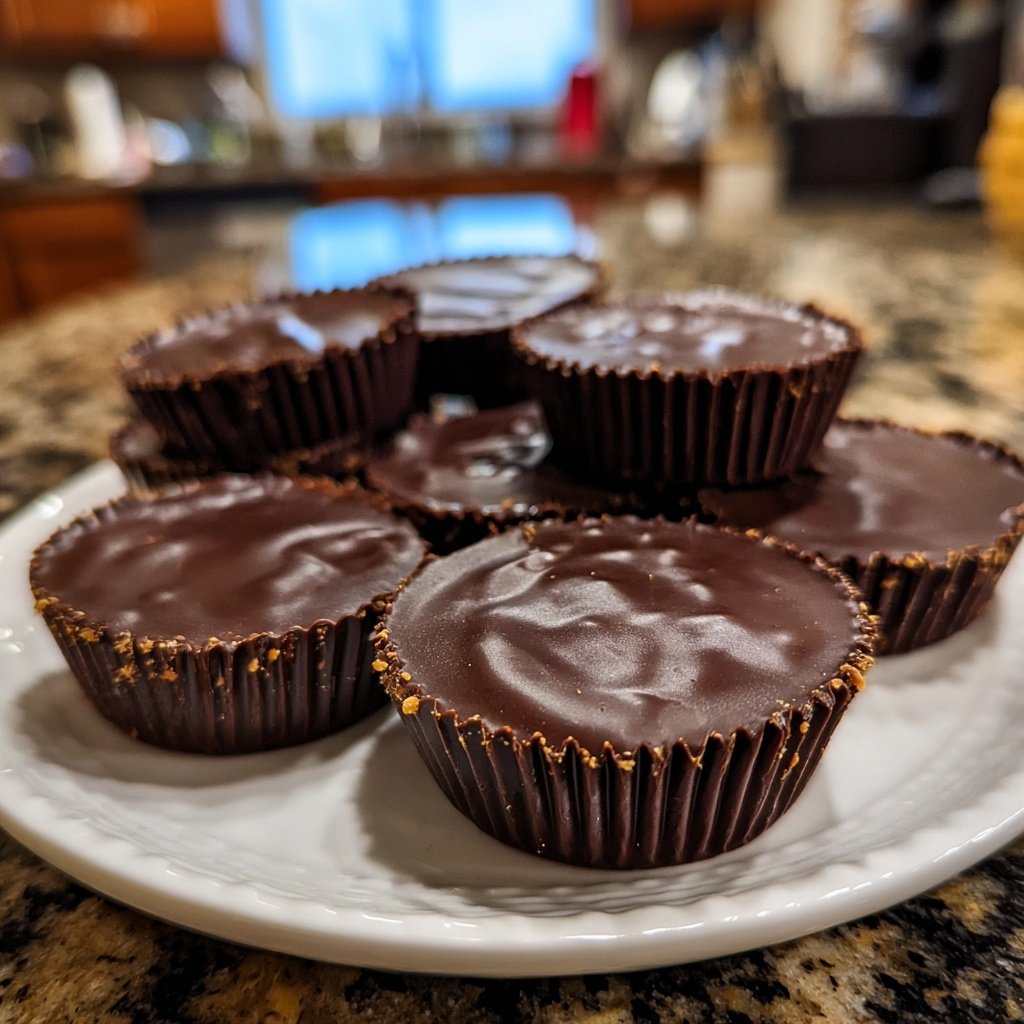
Achieving the perfect chocolate shell is crucial for a successful peanut butter cup. When melting the chocolate chips with coconut oil, be sure to stir frequently and keep a close eye to prevent burning. The coconut oil adds a delightful sheen and helps the chocolate to set nicely, making it easier to remove the cups from the molds. Microwave in short bursts of 30 seconds to maintain control over the melting process.
Once your chocolate is melted, it’s essential to coat the muffin tin thoroughly. I like to use a pastry brush for even application, ensuring that every corner is covered. A thick layer of chocolate may cause the cups to be difficult to bite into later, so aim for a thin, even coating around the molds. Freezing the chocolate after coating ensures a sturdy base for the filling.
Creating the Perfect Peanut Butter Filling
The peanut butter filling is where you can get creative! While creamy peanut butter is the traditional choice, feel free to experiment with other nut butters like almond or cashew for a unique flavor twist. You can also add a touch of honey or maple syrup to the mixture for added sweetness or even incorporate a sprinkle of cinnamon for warmth. Just be aware that variations can change the consistency slightly, so adjust powdered sugar accordingly.
For the best texture, use a room temperature peanut butter to ensure easy mixing. The filling should be smooth and spreadable without being too runny. After mixing, try a small taste—this is your chance to adjust sweetness or salt levels according to your preference. Proper seasoning is essential as it balances the richness of the chocolate and enhances the overall flavor.
Storing and Serving Your Peanut Butter Cups
Once your homemade peanut butter cups are set, you can store them in an airtight container at room temperature for up to a week. However, for longer freshness, I recommend refrigerating them, where they can last up to two weeks. If you prefer a firmer texture, chilling them before serving is a great idea, as the chocolate shell will harden, giving a satisfying crunch with each bite.
If you plan to make these ahead of time for a special occasion, consider doubling the recipe! Peanut butter cups are wonderful gifts as well. You can package them in decorative boxes or bags for a thoughtful homemade treat. Just remember to keep them chilled until serving, especially in warmer months, so the chocolate doesn't start to melt.
Ingredients
Gather the following ingredients to make your homemade peanut butter cups:
For the Chocolate Shell
- 1 cup dark chocolate chips
- 1 tablespoon coconut oil
For the Peanut Butter Filling
- 1 cup creamy peanut butter
- 1/2 cup powdered sugar
- 1/4 teaspoon salt
- 1 teaspoon vanilla extract
Once you have all your ingredients ready, you can start making these delicious treats!
Instructions
Follow these simple steps to create your homemade peanut butter cups:
Melt the Chocolate
In a microwave-safe bowl, combine the dark chocolate chips and coconut oil. Microwave in 30-second intervals, stirring in between, until completely melted and smooth.
Prepare the Molds
Using a brush or spoon, coat the bottom and sides of a muffin tin with some melted chocolate, creating a thin layer. Place it in the freezer for about 10 minutes to set.
Make the Filling
In a medium bowl, mix together the peanut butter, powdered sugar, salt, and vanilla extract until smooth and creamy.
Assemble the Cups
Once the chocolate shell has set, spoon a dollop of the peanut butter mixture into each mold, leveling it out. Pour more melted chocolate on top to cover the filling completely.
Chill and Serve
Return the muffin tin to the fridge for about 20 minutes, or until the chocolate is set. Gently remove the cups from the molds and enjoy your homemade treats!
After making these cups, I recommend storing them in an airtight container in the fridge for up to a week, though they probably won't last that long!
Pro Tips
- For an extra crunch, consider adding chopped nuts or crispy rice cereal to the peanut butter mixture.
Troubleshooting Common Issues
If you find your chocolate isn’t melting smoothly, it may be due to too much moisture from the bowl. Ensure your bowl is dry, and consider adding a teaspoon of additional coconut oil to help emulsify the chocolate. Also, if your chocolate is seizing (turning grainy), it can be saved by adding a small amount of warm liquid, like a splash of milk or additional coconut oil, while whisking vigorously.
Another common issue is difficulty in removing the cups from the molds. If they don't budge, try gently squeezing the sides of the muffin tin or placing it back in the freezer for a few minutes to harden the chocolate further. This should help release the cups easily while maintaining their shape.
Flavors and Variations
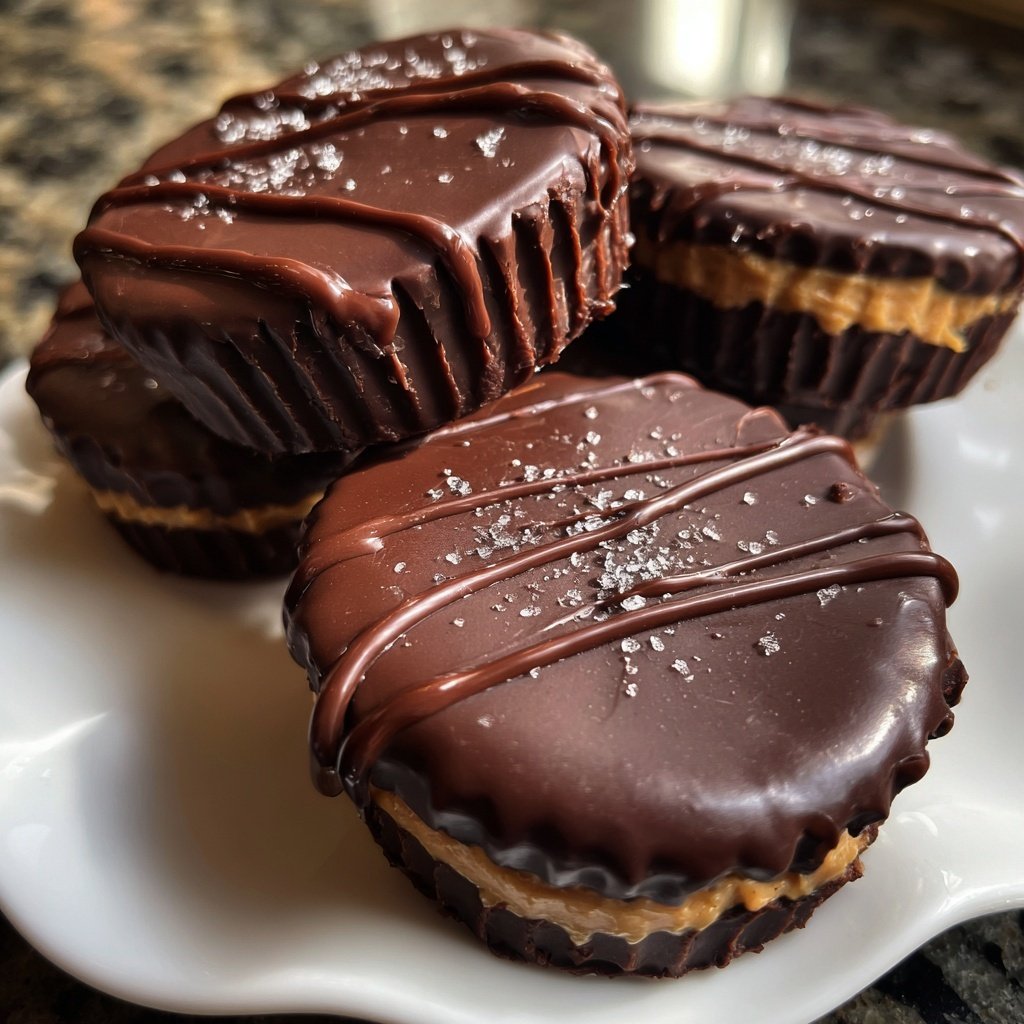
While the classic chocolate and peanut butter combination is a favorite, you can also switch things up with flavored chocolate. For example, using dark chocolate adds depth to the overall taste, while milk chocolate gives a sweeter touch. You might also consider adding a pinch of sea salt on top of the chocolate before it sets for an extra flavor burst that elevates the treat.
For those who enjoy a little crunch, consider mixing in finely chopped nuts, or even crispy rice cereal into the peanut butter filling. This not only adds texture but also an interesting visual appeal when you bite into the cup. Alternatively, try rolling the finished cups in crushed graham crackers or toasted coconut for an added twist!
Questions About Recipes
→ Can I use milk chocolate instead of dark chocolate?
Absolutely! Milk chocolate will give it a sweeter taste, so feel free to use your preferred type.
→ How can I make these vegan?
Use dairy-free chocolate chips and ensure your peanut butter is free of added ingredients.
→ What if I don't have a muffin tin?
You can use silicone molds or even mini cupcake liners as a great alternative!
→ Can I add flavors to the peanut butter filling?
Yes, you can incorporate flavors like almond extract, cocoa powder, or even a pinch of cinnamon for some extra flair.
Homemade Peanut Butter Cups with Chocolate Shell
Created by: Matilda Rowe
Recipe Type: Simple Baking Collection
Skill Level: Intermediate
Final Quantity: 12 cups
What You'll Need
For the Chocolate Shell
- 1 cup dark chocolate chips
- 1 tablespoon coconut oil
For the Peanut Butter Filling
- 1 cup creamy peanut butter
- 1/2 cup powdered sugar
- 1/4 teaspoon salt
- 1 teaspoon vanilla extract
How-To Steps
In a microwave-safe bowl, combine the dark chocolate chips and coconut oil. Microwave in 30-second intervals, stirring in between, until completely melted and smooth.
Using a brush or spoon, coat the bottom and sides of a muffin tin with some melted chocolate, creating a thin layer. Place it in the freezer for about 10 minutes to set.
In a medium bowl, mix together the peanut butter, powdered sugar, salt, and vanilla extract until smooth and creamy.
Once the chocolate shell has set, spoon a dollop of the peanut butter mixture into each mold, leveling it out. Pour more melted chocolate on top to cover the filling completely.
Return the muffin tin to the fridge for about 20 minutes, or until the chocolate is set. Gently remove the cups from the molds and enjoy your homemade treats!
Extra Tips
- For an extra crunch, consider adding chopped nuts or crispy rice cereal to the peanut butter mixture.
Nutritional Breakdown (Per Serving)
- Calories: 380 kcal
- Total Fat: 26g
- Saturated Fat: 15g
- Cholesterol: 195mg
- Sodium: 85mg
- Total Carbohydrates: 32g
- Dietary Fiber: 3g
- Sugars: 24g
- Protein: 6g